Showing posts with label holiday. Show all posts

Monday, January 4, 2016

Toddler painting keepsake - masked stencil canvas wall art


My two year old son loves to paint and draw. I end up with stacks of scrap paper covered in scribbles that I don't know what to do with, and they usually end up in the trash. Some of his projects make it to the fridge where they live for a month or two before being filed away in a box in the garage. Every so often I like to do a craft that is a little more of an "heirloom" - something that demonstrates where he is developmentally, but is also nice enough to have on display for the long-term. The kind of project that might become a gift for his loving family and friends.

From http://innerchildfun.com/2013/02/love-painting-for-kids.html
About a year ago (when he was still one), I saw on pinterest a way to use masking tape to make a painting. In that example, you simply tape out a letter shape with masking tape, allow your child to paint the whole canvas or paper, peel away the masking tape, and voila! Instant art! It acts as a sort ot reverse stencil.

I made one of those paintings with my kiddo, on a small stretched canvas, of the KLAW's first initial and hung it in his play kitchen.

My pal Darcy, of Moonlady's Kitchen, saw our project and totally cranked it up a notch. Instead of simply using tape as-is to make block letters, she began using sheets of tape to make stencils of different shapes, and from there we took off to all sorts of projects. Here is a tutorial on how to make a variety of cute DIY wall art with your toddler.

1. Start with a stretched canvas or flat canvas in the size you want. You can either use regular acrylic craft paint (I buy mine at Walmart for 50 cents a bottle - and let the little guy pick out a new color every so often) or washable paint and then protect it with a clear coat of spray paint when you're done.

2. If you want a background color, begin by painting that. For the horse, We did the blue for the sky on half the canvas, let it dry, taped off the area that was blue with a design to make it look like a rolling field, and painted the bottom half green. I've found that putting blobs of different color paint on the canvas and letting the kiddo smoosh it around with a paintbrush is a good way to get full coverage, pretty patterns, and control where the paint goes.
PRO TIP: Choose colors that are within about 3 to 5 segments of each other on the color wheel for each design. If you glob on orange and blue, or red and green, you'll end up with a muddy brown mess. Stick with all cool colors or all warm colors; add in a little white, or use a variety of intensities (bold to pastel) to get a nice variation of color to create texture.

3.  Download simple line art/clip art of the design you want. Print out the images, scaled to fit on your canvas. Or, if you're super artsy, you can free-hand a design later. But tracing, for me, yields great results. (I suppose if you have a fancy Silhouette Cameo machine, you could probably have something cut out by that, too...)

4. Apply masking tape in overlapping rows to a piece of parchment paper. It will be pretty transparent so you can trace the design you printed out on to the tape or parchment.


5. Once drawn, with the tape still attached to the parchment, cut out the design. I used scissors, being careful that the cuts on the outer portion were tidy, but chopping up the poor tape horse.

PRO TIP: If you have a cutting mat and an Xacto or rolling cutter, that would work and you would be able to preserve the inside design to use as a reverse stencil on another project. Darcy has even used the tape peeled off from that reverse stencil type project to make an additional craft, such as a greeting card (on the right). (Thanks, Darcy!)

6. Peel the stencil off the parchment and apply to your canvas (once the background paint is dry). Use additional tape to mask of any areas not covered by the stencil. Use your fingernail to press around the edges of the design so they are tight against the canvas to minimize seepage.

7. Repeat the painting process used for the background- putting blobs of paint in the design area and allowing the child to paint. Make sure the whole design is filled in.
What my child painted
 8. When the paint is dry, remove the tape to reveal the design.

What the result looks like
9. Finish with any details you may want to hand paint, such as the faces I added to these cardinals and the branches on which they are perched.

Here's one more we made, for which the little guy selected a bold color scheme.
masked
finished
There are so many possibilities with this technique, and it doesn't have to be exclusively for toddler art.  This blogger used sheet music (scrap paper) as the background and adhesive stencils available from Michael's. The beauty of the masking tape method, though, is that it is CHEAP and quick to do with items on hand - which is key when you've got little ones running around.

Sheet music stencil on savedbylovecreations.com
  Here's another blogger's version that looks very trendy! Cheap and easy update to your decor.

Chevron art from laurawadsworth.com
This post contains affiliate links.

Friday, February 13, 2015

Valentine Pinwheels Recipe


Last week I signed up to bring a treat to my toddler’s day care Valentine’s Day party. The only other thing listed on the sign-up sheet was cupcakes, so I thought I’d bring something savory. But what to bring. I was browsing pinterest and saw a cute craft where you shape a toilet paper roll into a heart and use it as a stamp. This sparked an idea. I made cream cheese pinwheels for the KLAW’s first birthday… I wondered if I could shape them in to hearts. Turns out, I could – they looked super cute and were quite tasty! I modified the original recipe to make it a little more red and valentines-ish. Here is the recipe. It wasn't a hit with all the toddlers, but you could modify the mix-ins to suit your audience’s taste. It takes less than 30 minutes to prepare the night before your event, then another 15 minutes or less to slice them up the day-of. This recipe makes 40 pinwheels.


INGREDIENTS
2 eight ounce packages of cream cheese (softened)
1 package ranch dressing mix
½ cup diced red pepper
¼ of a red onion, diced
2 ounce can of chopped olives
½ cup shredded cheese
4 large sun-dried tomato tortilla wraps

Mix the ranch dressing mix into the cream cheese, then fold in the pepper, onion, olives and cheese. 
Try not to eat the mixture
Spread the mixture on the tortillas. You can go easy on spreading the mixture on the two sides that become the open ends of the roll because you will slice them off. 

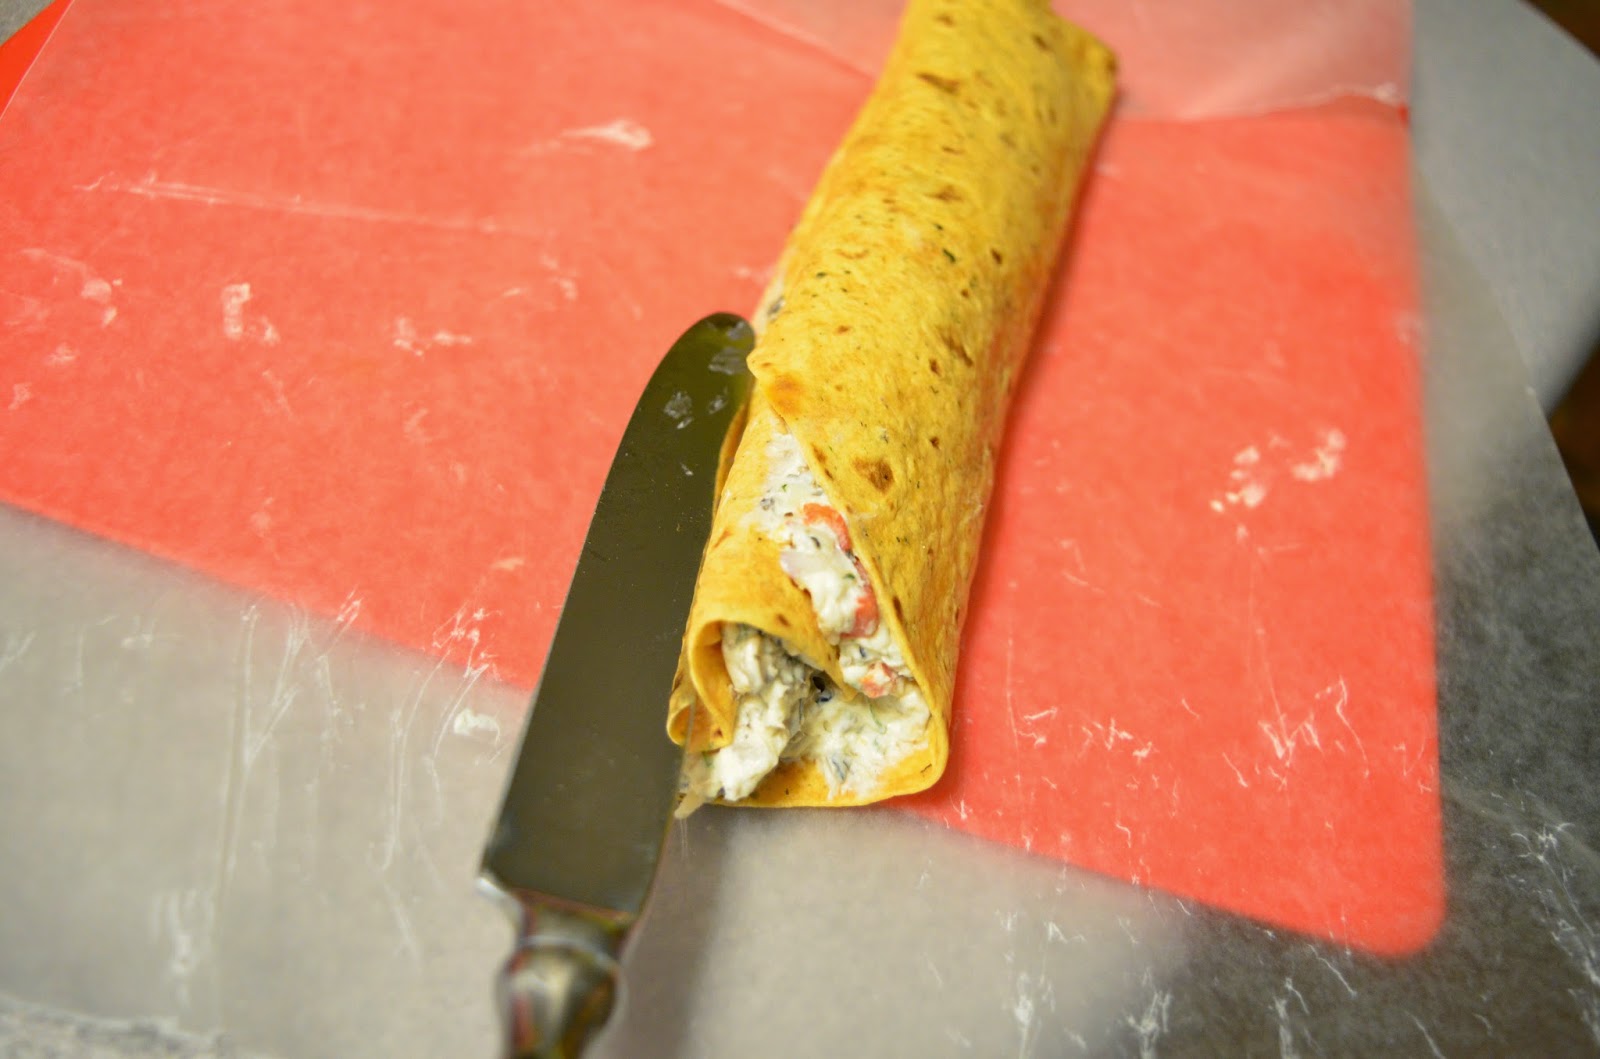
Roll the tortillas tightly.
Once they are rolled, form the hearts. Pinch one side to form a point, along the roll, to form the bottom of the heart. Opposite the point, use the dull end of a butter knife to press in a divot along the roll to form the top part of the heart. 
Wrap each tube Tootsie Roll style in waxed paper. Refrigerate overnight to allow the ranch flavors to fully come out. 
heart
tootsie roll
In the morning, using a serrated knife to gently saw the roll so as not to smoosh it, cut the ends off the rolls, and then slice each tube into approximately 10 slices (about ¾”-1" each). You can pinch the slices to make them a little more heart-shaped if they look wonky. Arrange on a plate and serve!
slice into 3/4" slices

arrange artfully

Thursday, February 6, 2014

Valentine's Day Photo Prop - Cupid's Arrows

I am going to take pictures of my five month old son for Valentine's day, and was thinking of dressing him up like Cupid. I wanted to craft some little arrows for him to hold but needed them to be super simple. Here is my solution.

First I traced hearts on some red cardstock using a cookie cutter as a template - the smallest one from a set I found at the Target One Spot (dollar bins). Click through for the Cartwheel offer to save more at The One Spot! It is about 3" tall. The hearts will be the spear part of Cupid's arrow


 Next I cut rectangles about 1.5" x 3" and folded in half. I cut the top and bottom on a diagonal to make a diamond shape, and snipped out little strips and tore off the skinny pieces. This made the feathers (when unfolded it became a V shape)


I had on hand some red straws from a pack I found at Ikea. You can use any old drinking straw. Snip a 1" long slit in both ends of the straw and slide the heart in one end and the feather in the other


Voila! Cupid's arrows for your Valentine's Day photo shoot! I didn't add any glue or anything since the paper stayed wedged in there pretty well. But I suppose you could!
Photos from the Valentine's Day photo session to follow...